This Adobe Photoshop tutorial will show you how to create a clean looking layout for your personal portfolio website. The effects use here are very simple and novice Photoshop users should be able to follow this tutorial fine. I will be using Adobe Photoshop CS2 for this tutorial. I plan to upgrade to CS3 later this week, so look for more CS3 tutorial in the future.
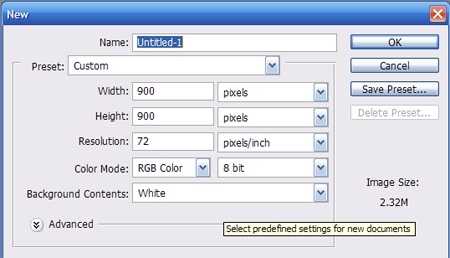
Start with a new document 900×900 pixels with a background color of white.
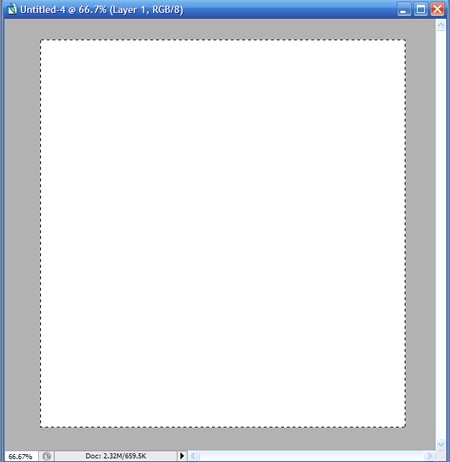
Now fill the background with #b2b2b2 by selecting the color as your foreground color and press ALT+Backspace. Then create a new layer and draw a large rectangle using the Rectangle Marquee tool. Fill your square with white.
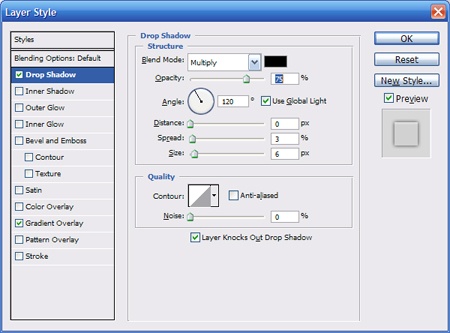
Now right click on the layer and select Blending Options to open the Layer Styles window.

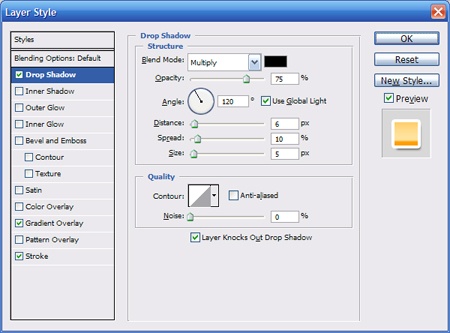
Apply the following layer styles to your rectangle layer:
Drop Shadow:
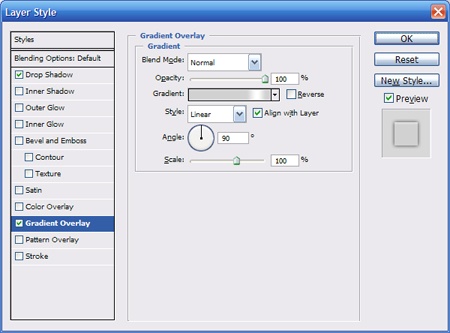
Gradient Overlay:
Here is the gradient I used (double click the gradient bar to open this window):

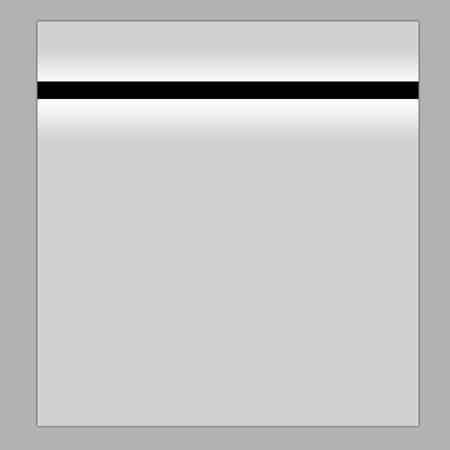
Now create a new layer. Draw a small rectangle through the white part of you gradient. Fill the rectangle with black (#00000).
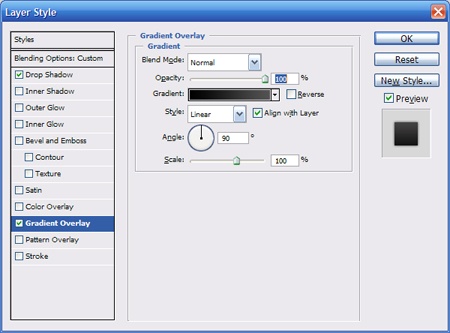
Now open the Blending Options and apply the following settings:
Drop Shadow:

Gradient Overlay:
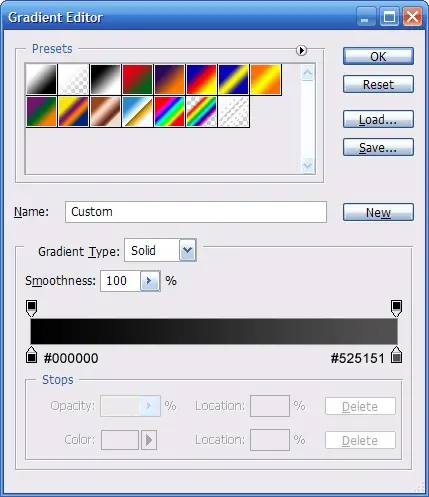
Here is the gradient:
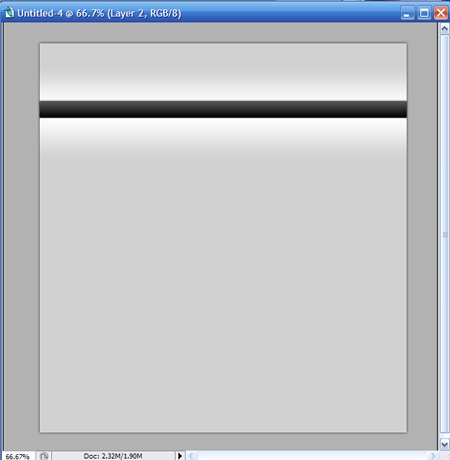
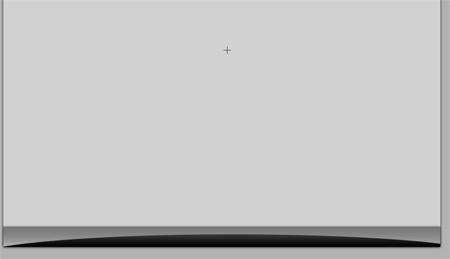
Apply the changes and your image should look something like this.
Now we need to select the rectangle by CTRL+Clicking on the layer in the layer palette.

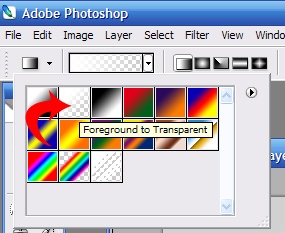
Now create a new layer. Make white your foreground color. Now fill the rectangle with the gradient tool using the Foreground to Transparent gradient.
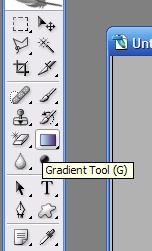
Gradient Tool
Select the gradient from the drop down menu:
Now fill your rectangle on the new layer by clicking and dragging the mouse from bottom to top. You should begin and end where my arrow is shown.
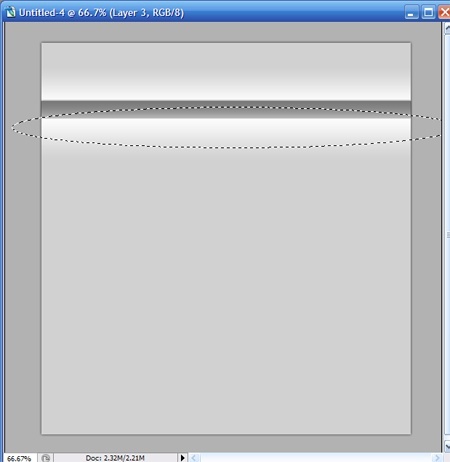
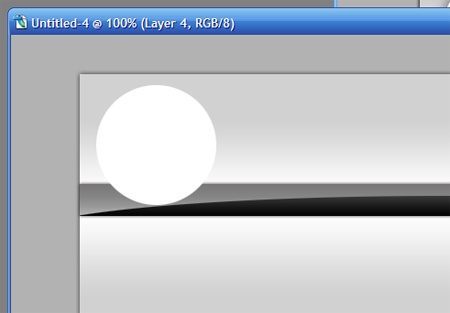
Now grab the Elliptical Marquee Tool and make a selection like below.
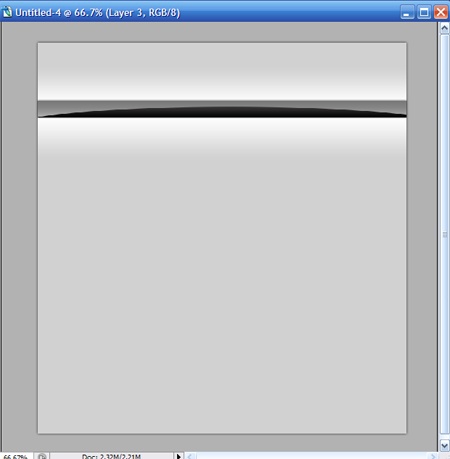
Now delete the selection by pressing the delete key on your key board. You image should now look like this.
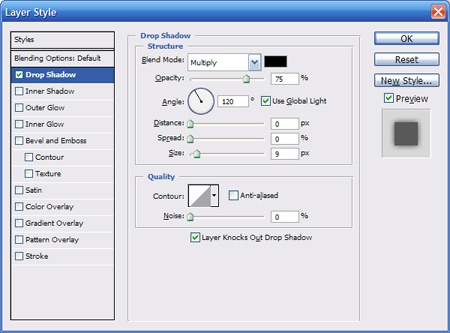
Next I will add a circle to the header that you can put your picture in or in our case a free graphic from the web. Create a new Layer and Using the Elliptical Marquee tool create a circle and fill it with White #ffffff. Note: Holding the CTRL button down while creating the circle will form a perfect circle.
Now we will add a drop shadow to the circle.
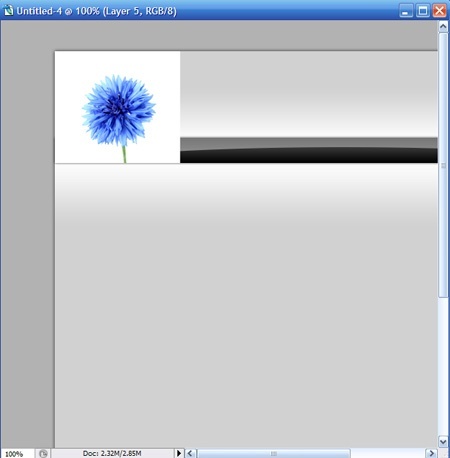
The image should look like this. Now you can add the graphic of your choice. Create a new layer and paste it over top of you circle. Resize the image to your liking (we will be cropping it to fit in the circle. (I found my picture at sxc.hu if anyone is interested. That site is a free photo stock website. You have to register to get the images.)
Now select CTRL+Click on the Circle layer in the Layers Palette to select the circle (just like we did before with the rectangle. Now make sure you single click on the new image layer so that the shanges will be applied to it.
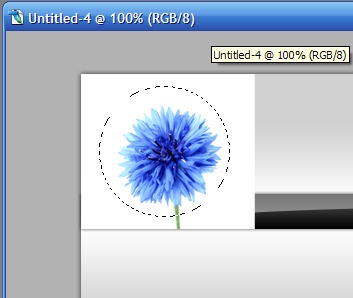
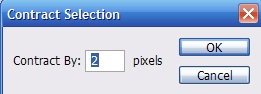
Now go to Select>Modify>Contract. Contract the selection by 2 pixels.
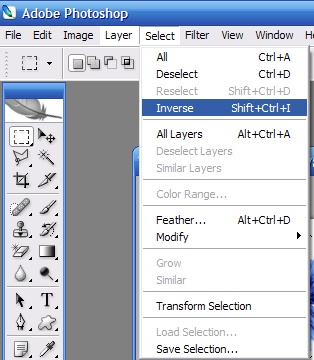
Now we want to select the inverse so we can delete everything but that circular selection. Go to Select >Inverse.
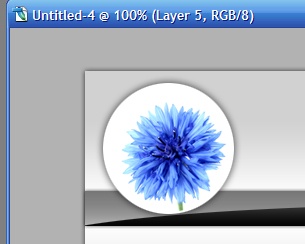
Now Press the Delete Key. Your Image Should Look Like This.
Using the text tool bar with Arial Black as your font in 60pt size add your name to the top of the portfolio.
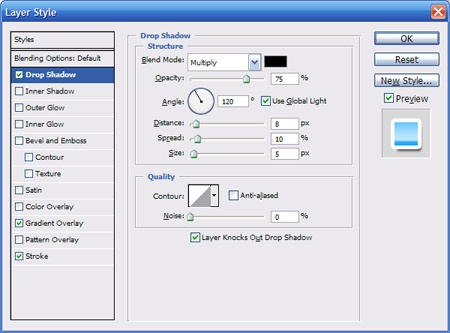
Apply the following Blending Options to the text:
Drop Shadow:
Gradient Overlay:
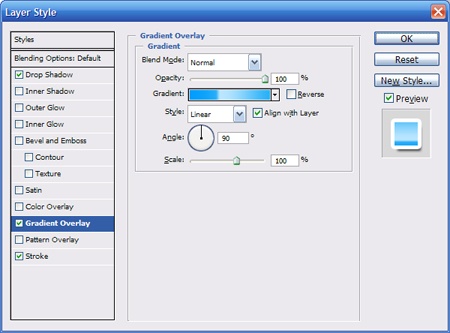
Here is the gradient (to get to this double click on the Gradient bar in the on the screen pictured above)

Drop Shadow:
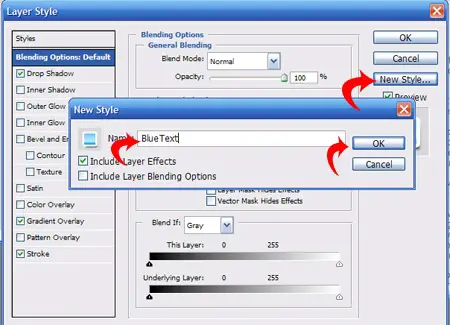
Now we will save this style so that we can use it again later. Click on the New Style Button, then give your style a name and click ok.
Apply the settings and you site template should look like this

Now using the text tool bar at the words Online Portfolio just under your name using Arial Black 24point.

Now go into your blending option and apply the following settings.
Drop Shadow:
Gradient Overlay:
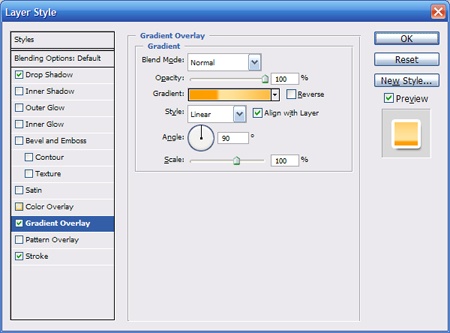
Here is the gradient:

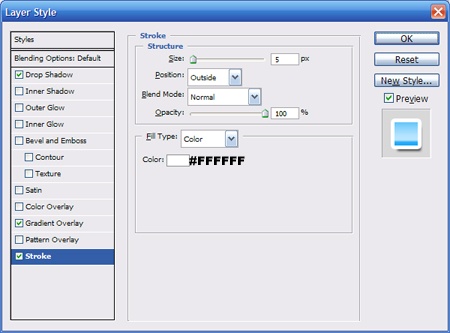
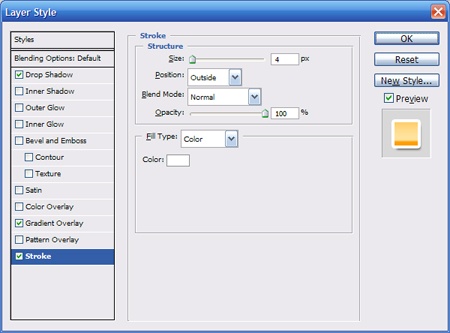
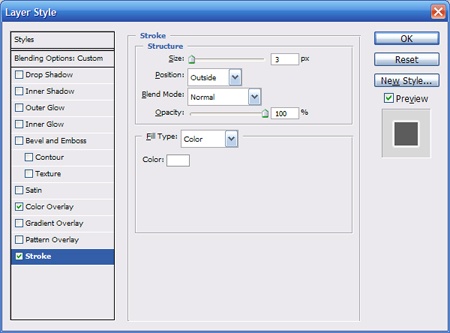
Stroke:
Apply the changes and your header should look like this.

Ok. Now lets apply the links to our header. Using the text tool bar with Arial Black 22 point add the text picture below.

Now apply the following Blending Options.
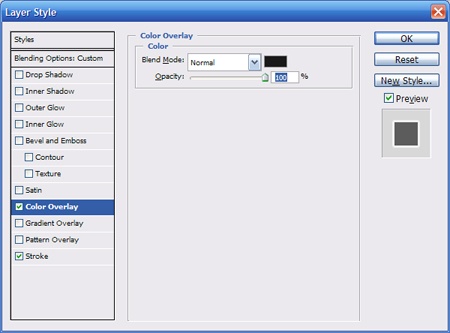
Color Overlay:
Stroke:
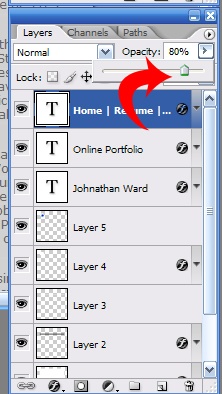
Apply the changes. Then lower the opacity of the layer to 80%.
So now we have the links added and the page should look like this.

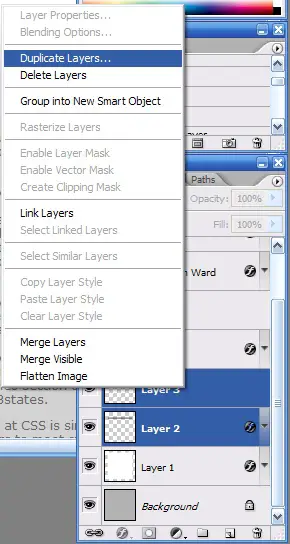
Now we will add the website footer. Find the two layers for the black bar. CTRL+Click on both of them to select both the layers in the layers palette. The right click on them and select duplicate layers.
Click ok if a box pops up asking you if you want to duplicate the layer. Now select your duplicate layers and, select the Move tool to move both layers to the bottom of the layout. It should look like this.
Apply your footer text using Arial Black 22 point.

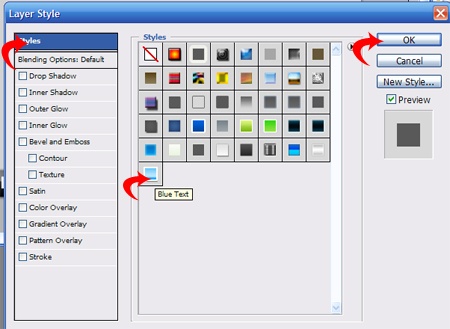
Now open the blending options window. We are going to apply the blue style that we saved earlier. Select styles on the left. Then select the style you saved and hit OK.
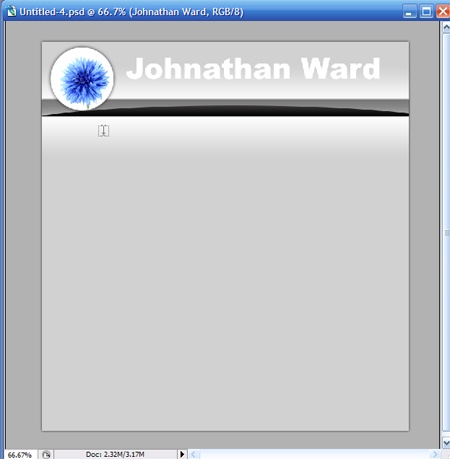
Now you can add your final text to the page using the text tool bar. The final layout should end up looking like this