Since CSS has become so popular lately, there has been a lot of bad talk about tables. From what I have read using tables is taboo. This article will show you how to create tables using XHTML and explain why I believe there is still a need for tables.
First, we will talk about web layouts. A few years ago, before I learned CSS, I can remember chopping up an image and Photoshop and jumping straight into creating a table. Of course now the best way to do a layout is with CSS/XHTML. Tables are no longer accepted as a layout method and I would have to agree with that. The best way to present a layout is by using CSS and DIV tags.
So when should you use tables? I think it pretty obvious that when you are displaying tabular data, a table is the best way to do that. There are some people who believe that you should use nested DIV tags for this. The thing is that is way more difficult that using a table for what it was designed to do. I’m sorry, but I do not see the need to make 100 DIVS and define the style with CSS. Like I said, if you are displaying tabular data a table should be used.
Now that I have explained why tables should still be used, let’s go over creating a table using XHTML. In this tutorial I will show you how to create the basic structure for the table. In a tutorial later I will show you how to apply some CSS to change the style of the table.
Begin with the open and close table tags. We will add a border for the purpose of this tutorial. Later in part 2 we will define the style of the table using CSS.
<table border="1">

</table>
The basic tags that make a table are: TR which is a table row, TD which creates a table cell or column and TH which defines a cell as a table header.
So we are going to create a row in the table
<table border=”1”>

  <tr>

  </tr>

</table>
Next we will add the TH tags to create our table header. My table will have three columns as you will see below.
<table border="1">

  <tr>

  <th>First Name</th>
  <th>Last name</th>
  <th>Age</th>

  </tr>

</table>
That is all the data for that row. Now we will add another row in our table using the TR tag. This time the cells are not header cells so we will create them using the TD tag.
<table border="1">

  <tr>

  <th>First Name</th>
  <th>Last name</th>
  <th>Age</th>

  </tr>

  <tr>

    <td>John</td>
    <td>Ward</td>
    <td>21</td>

  </tr>

</table>
Now for all the other rows in our table we can copy the last row we created and update the info.
<table border="1">

  <tr>

  <th>First Name</th>
  <th>Last name</th>
  <th>Age</th>

  </tr>

  <tr>

    <td>John</td>
    <td>Ward</td>
    <td>21</td>

  </tr>

  <tr>

    <td>Mike</td>
    <td>Maguire</td>
    <td>21</td>

  </tr>

</table>
Now there is no limit to the number of rows you can add. Have fun adding some data.
<table border="1">

  <tr>

  <th>First Name</th>
  <th>Last name</th>
  <th>Age</th>

  </tr>

  <tr>

    <td>John</td>
    <td>Ward</td>
    <td>21</td>

  </tr>

  <tr>

    <td>Mike</td>
    <td>Maguire</td>
    <td>21</td>

  </tr>

  <tr>

    <td>Sara</td>
    <td>Lee</td>
    <td>61</td>

  </tr>

  <tr>

    <td>Walter</td>
    <td>Reed</td>
    <td>1</td>

  </tr>

</table>
Once you add the data, save the file with a .htm extension and open it in your favorite browser. You should see something like this.
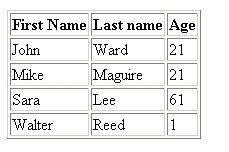
Of course these are basic tables and could use an upgrade in the looks department. There are several HTML properties that you could define to change the style of these tables. I will not be showing you how to do that. I will show you how to style them using CSS since that is the standard today. Look for that tutorial in the future.