
Are you developing a WordPress site but want to make changes locally before applying them to your live site? Tired of breaking things in production? This tutorial will help you set up a local development environment for your WordPress site on your Mac or Windows desktop. We’ll also show you how to backup and import the data from your live website into the local environment for testing.
For this tutorial, I will be using a Mac but the MAMP software is available for both Mac and Windows. Windows users should generally be able to follow this tutorial with some slight tweaks.
Prerequisites and assumptions
For this tutorial you will need the following:
- A Local Mac or Windows desktop
- An already live WordPress site hosted on your own server (WordPress.org not WordPress.com)
- The site should be hosted on a platform that includes the cPanel control panel application.
- If you don’t have cPanel you will need to be able to make a backup of your site and database via your hosting provider on your own
- Access to both your files via FTP or SSH and the ability to backup your database.
- A local SQL client to connect to your local database and import data
Installing MAMP
MAMP is a software suite that allows you to run apache, MySQL, and PHP locally on mac or windows. There is a free version and a paid version of MAMP that includes many more features. For this tutorial, I will use the free version of the MAMP software to set up a local WordPress development environment. You might want to look into the MAMP Pro software if you’re looking to do some more advanced local hosting. like having multiple sites and hostnames.
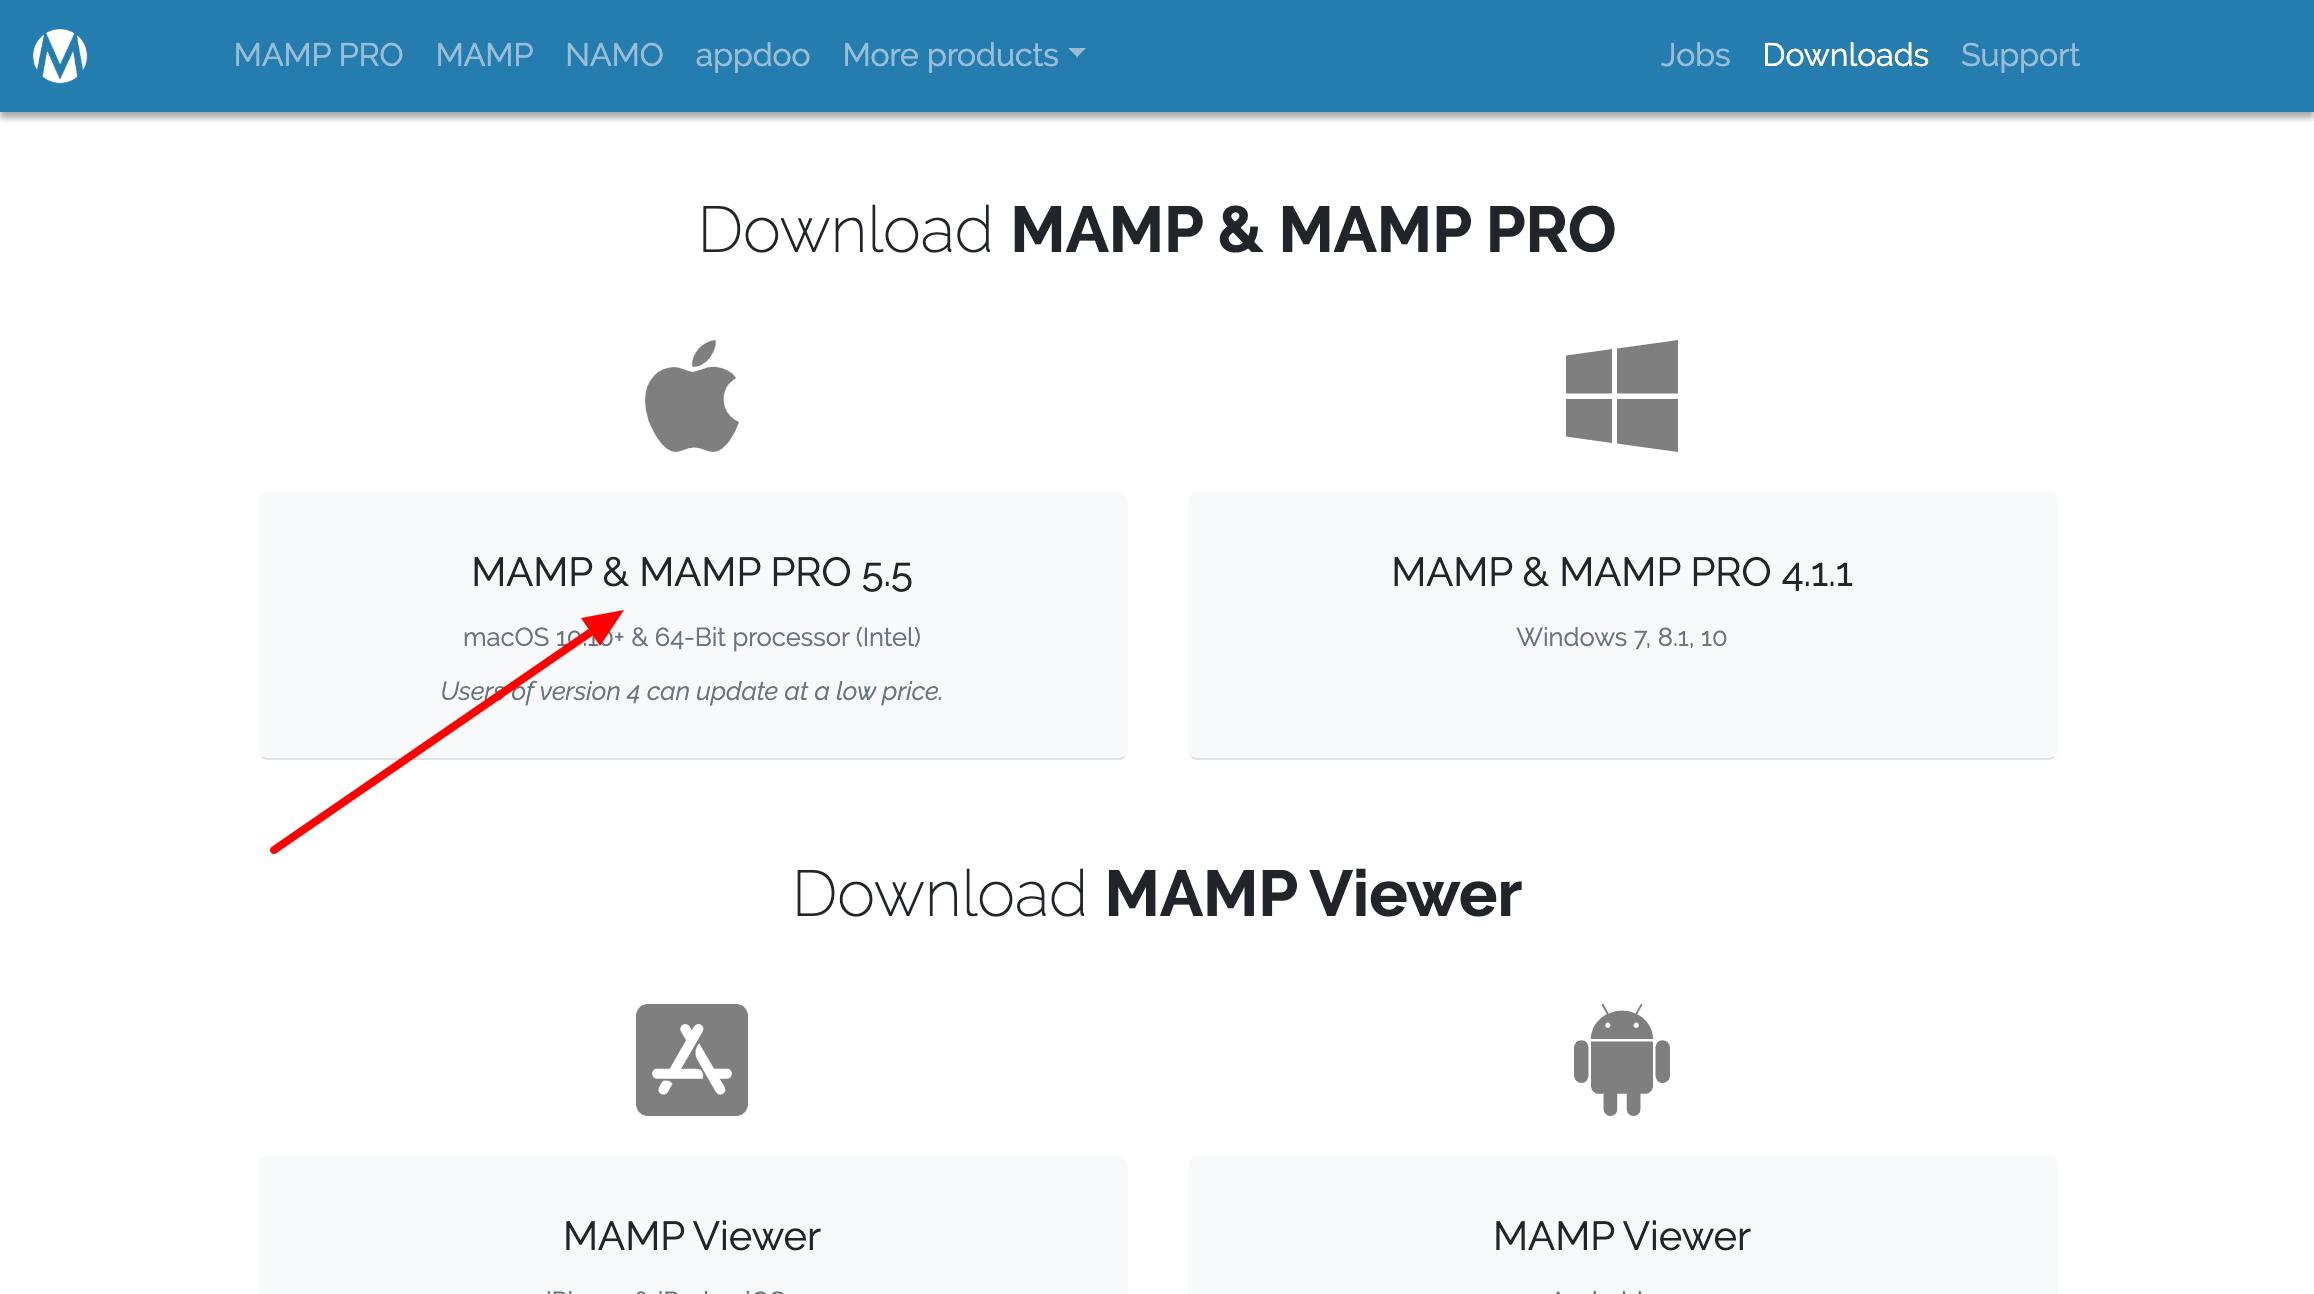
Go to the MAMP Downloads page and select the package for your operating system. I’ll download the Mac package since I’m using a Mac.
Once the file is downloaded it open the installer and follow the instructions. There really aren’t many choices so I won’t screenshot them. Just pick the default settings.
Now you will have two applications installed. MAMP and MAMP Pro. For this tutorial, you want to launch MAMP. In my case, it was installed inside a folder call MAMP. So I will launch the non-pro version of MAMP.

On the MAMP control panel click on “start servers”. Once the servers are started you want to go to the MAMP preferences from the top menu. On Mac, this is done on the menu bar. In Windows, this is probably under the File menu.

Now the preferences panel will open. You want to click on the “Web Server” tab and take not of the “Document Root” folder. This is where you will store your files.

Now open the document root folder and keep it for later. I changed mine to my home directory > sites so it’s easier for me to remember.
MAMP is set up and ready for us to use. Next, we’ll back up our production site.
Backing Up Your Live/Production WordPress Site
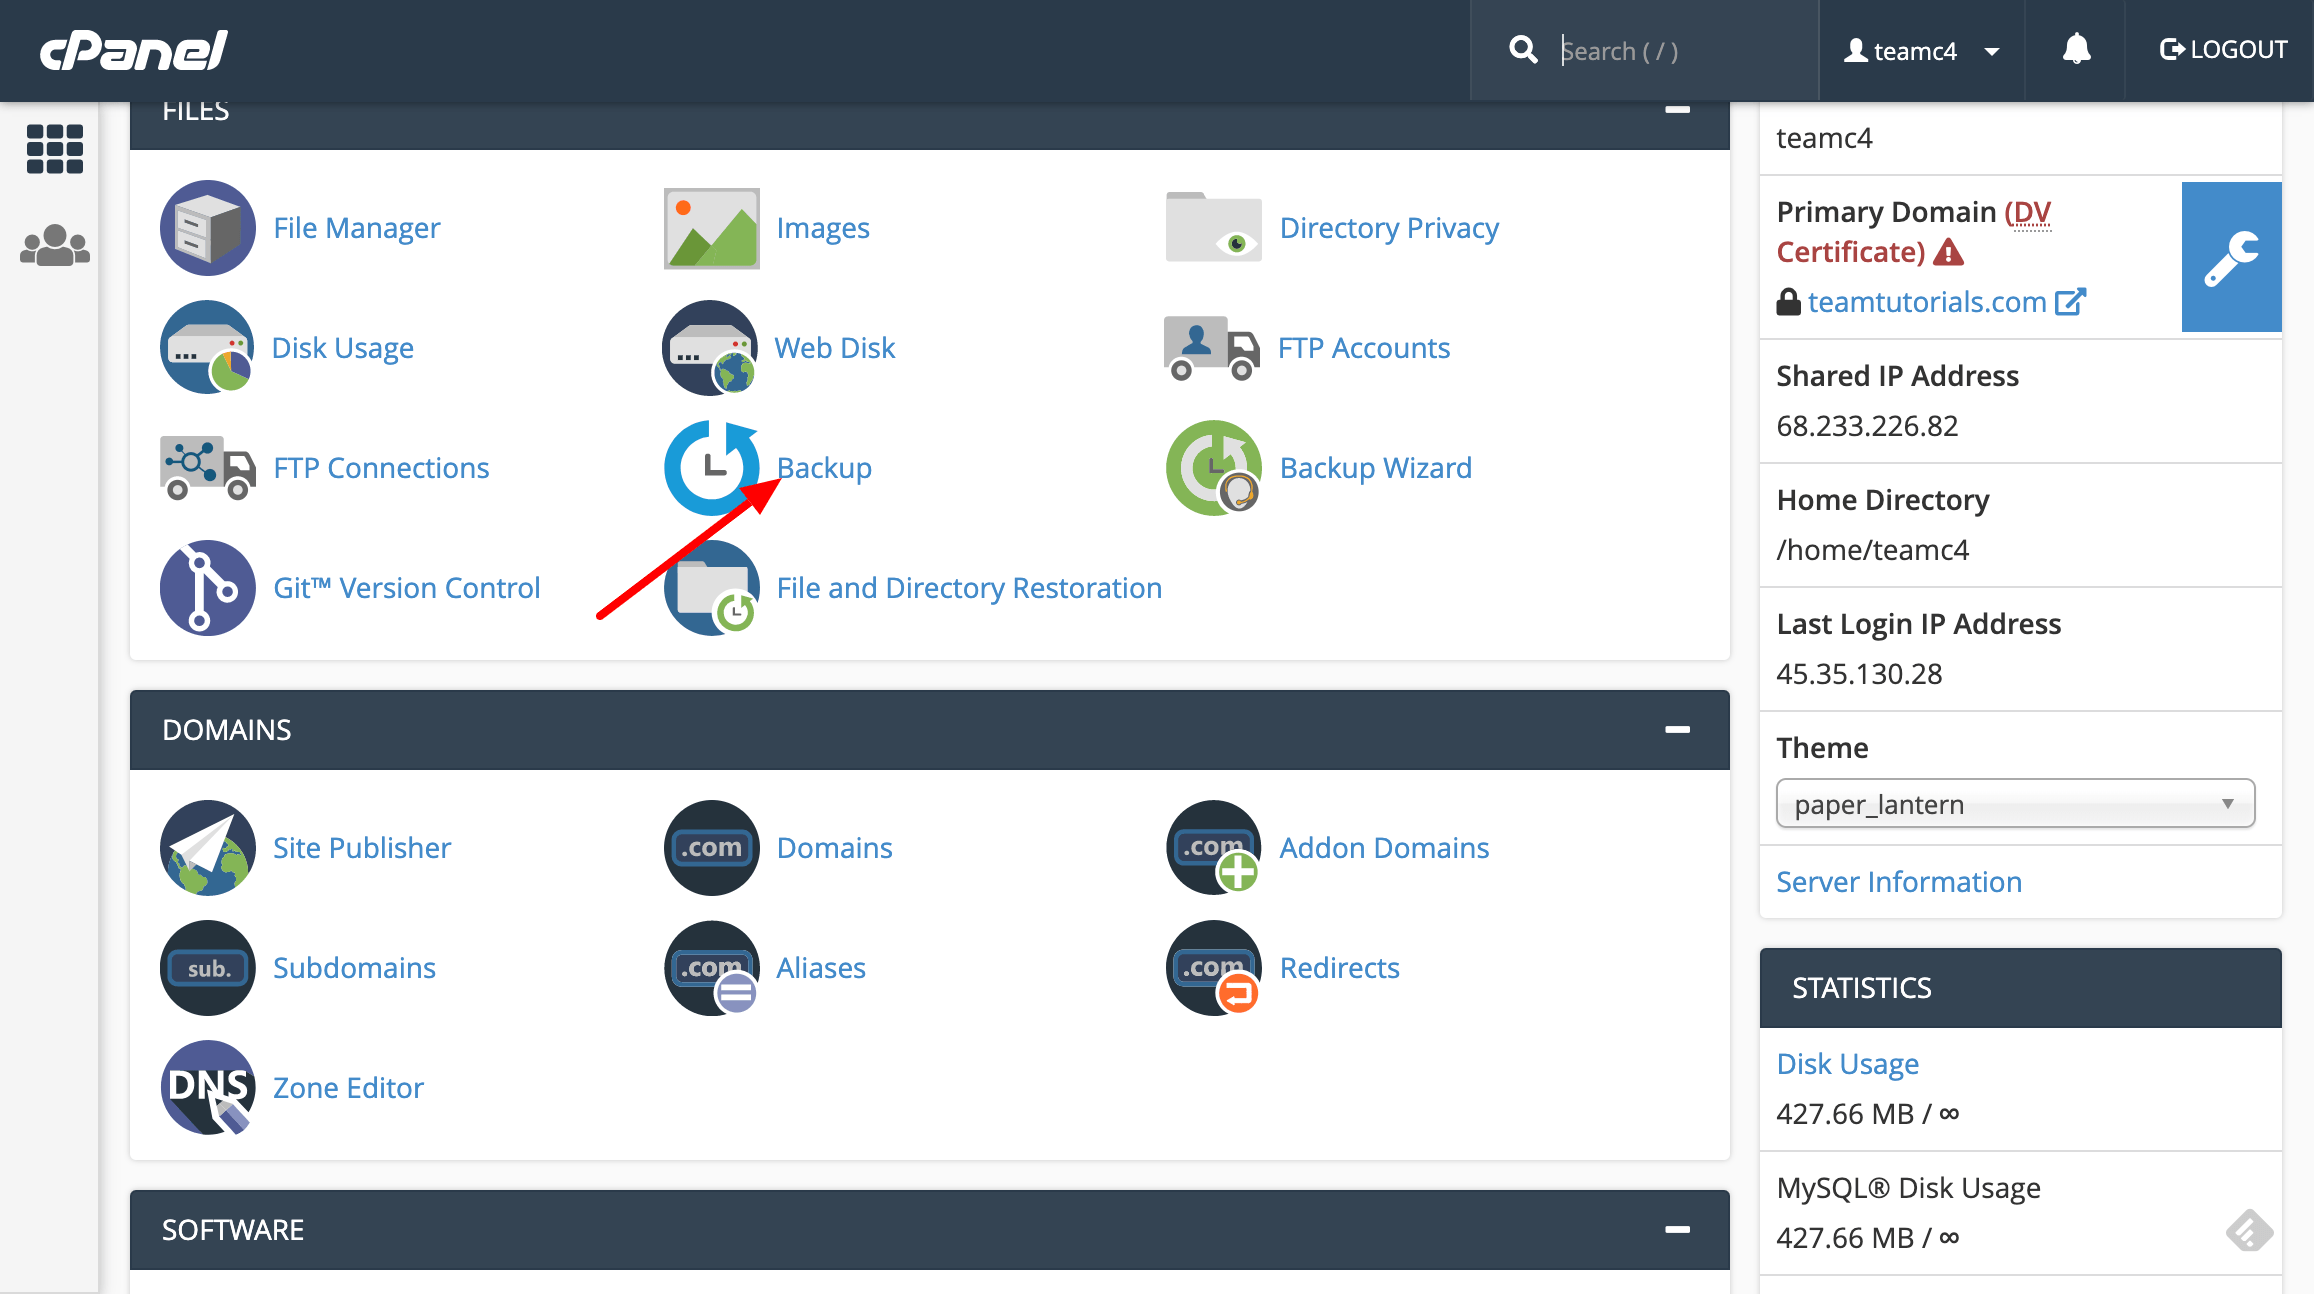
Now we need to back up the WordPress files and database from cPanel. Log into cPanel on your website. Hint: it’s usually port 8082 on your domain. So for me it would be teamtutorials.com:2082

In cPanel locate the “backup” link and click it.
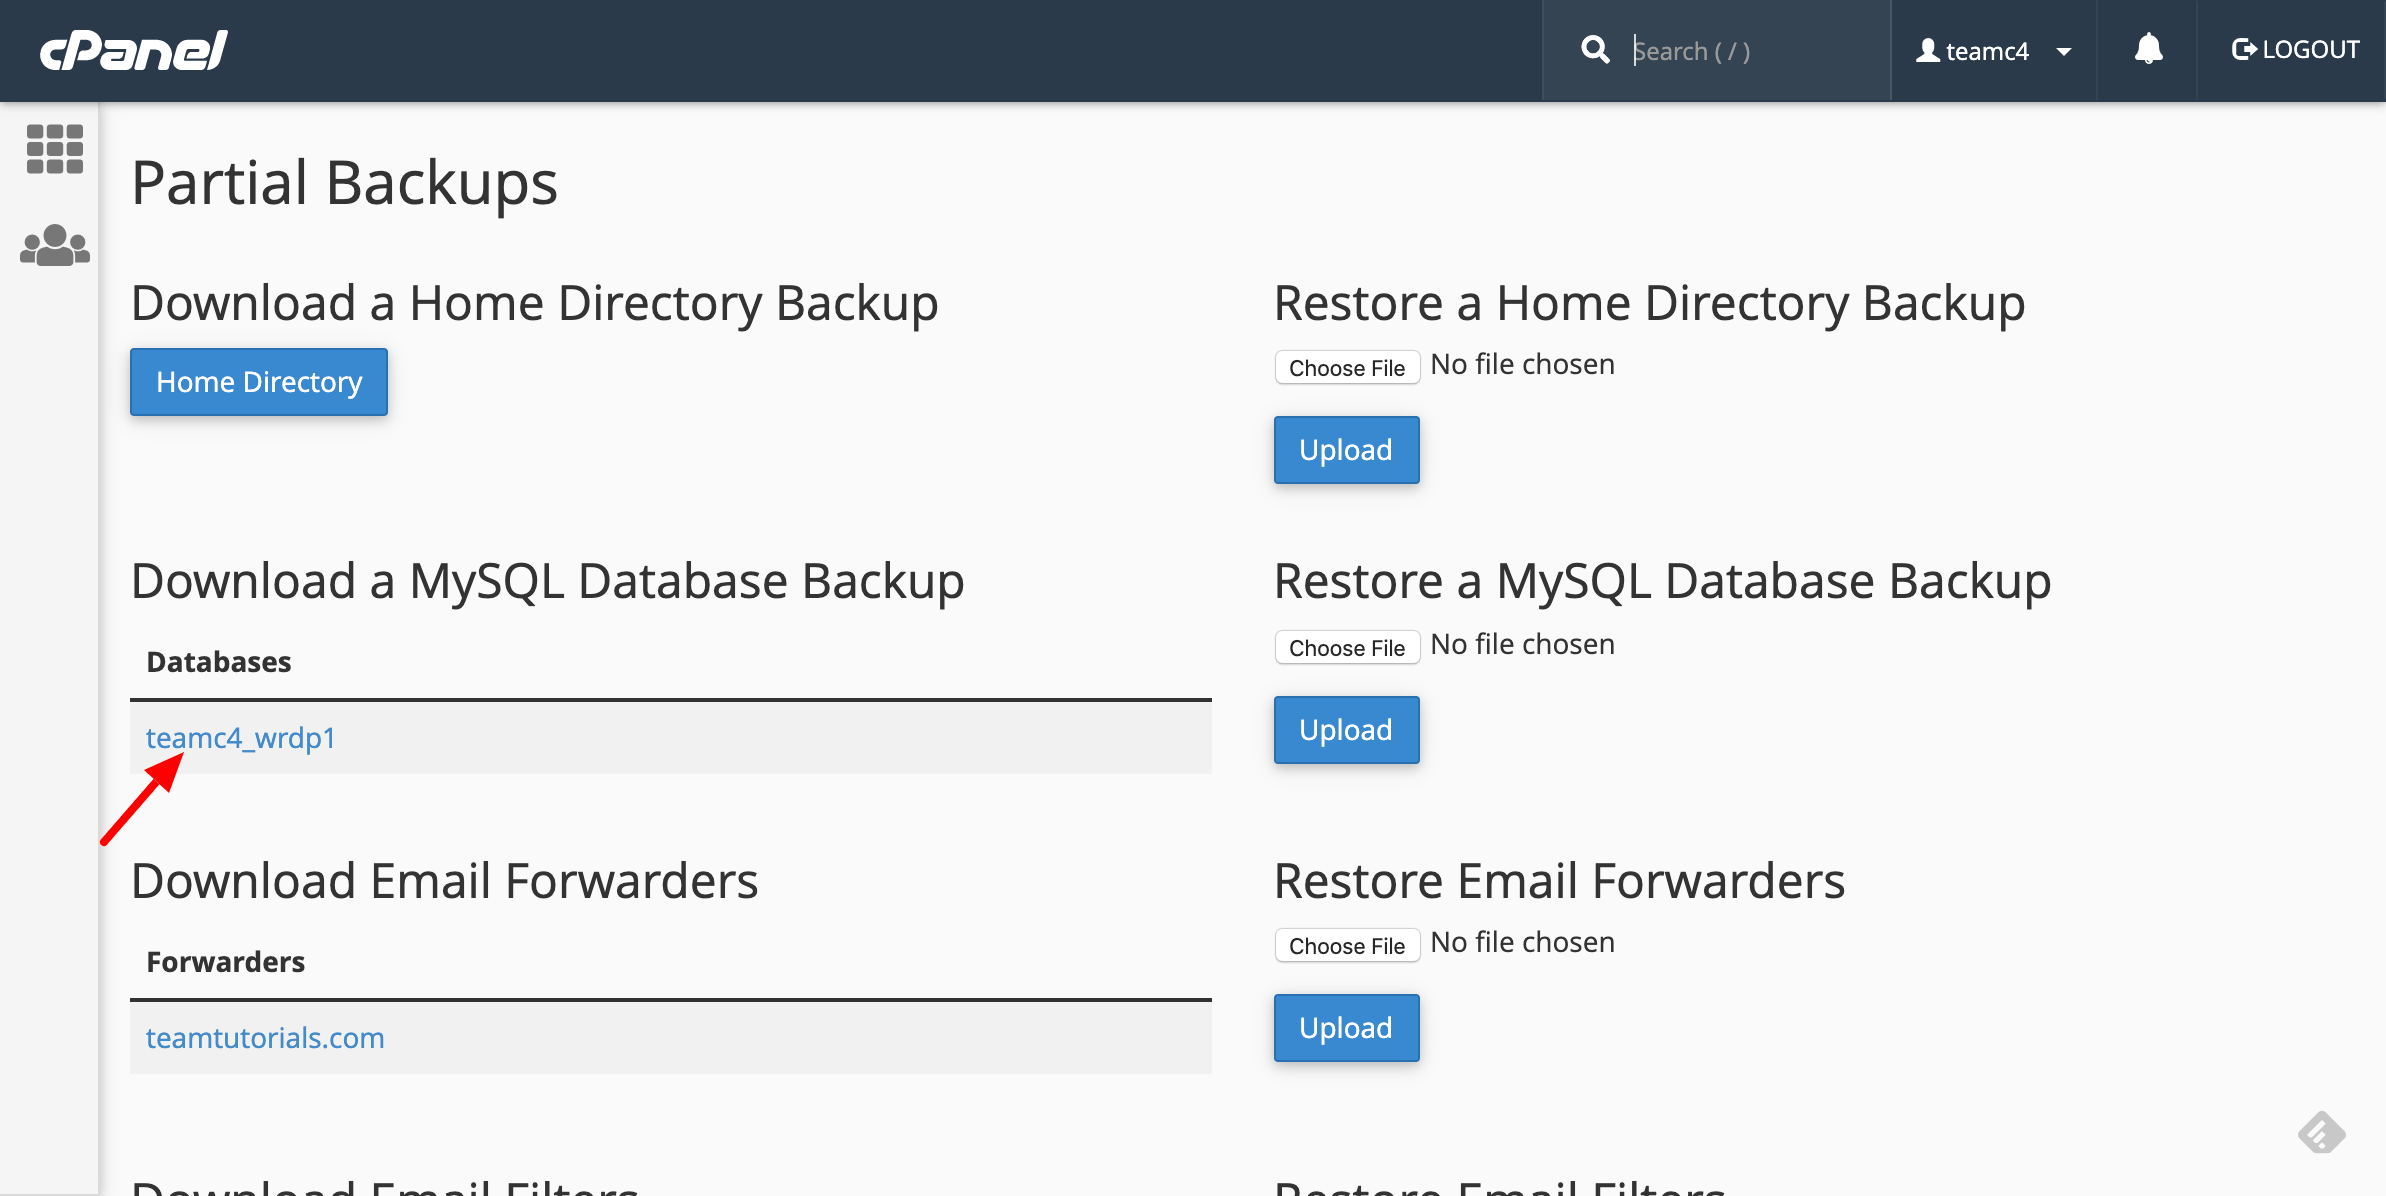
On the backup screen scroll down to “Download a Home Directory Backup”. Click the “Home Directory” button and save this in a place you will remember. This download may take some time depending on how large your site is.

Next got to the “Download a MySQL Database Backup” and click on the name of your WordPress database. In my case, it’s called “teamc4_wrdp1”. Download this file to the same location as your other backup.
That’s all it takes to backup your WordPress files and database using cPanel.
Importing Your Files to MAMP
Once your files have completed downloading you are going to want to extract the home directory backup. Mine is called “backup-teamtutorials.com-11-8-2019.tar.gz”. I’ll extract this on Mac by double-clicking it. You may need another utility like 7zip to extract the files on Windows.

Next, we need to copy the contents of the “public_html” folder into the document root folder that I mention earlier. Mine is /jward/sites/. So I copy only the contents of /downloads/backup-teamtutorials.com-11-8-2019/public_html/ into /jward/sites/ (which is my root directory for MAMP).
Create a MySQL Database in MAMP
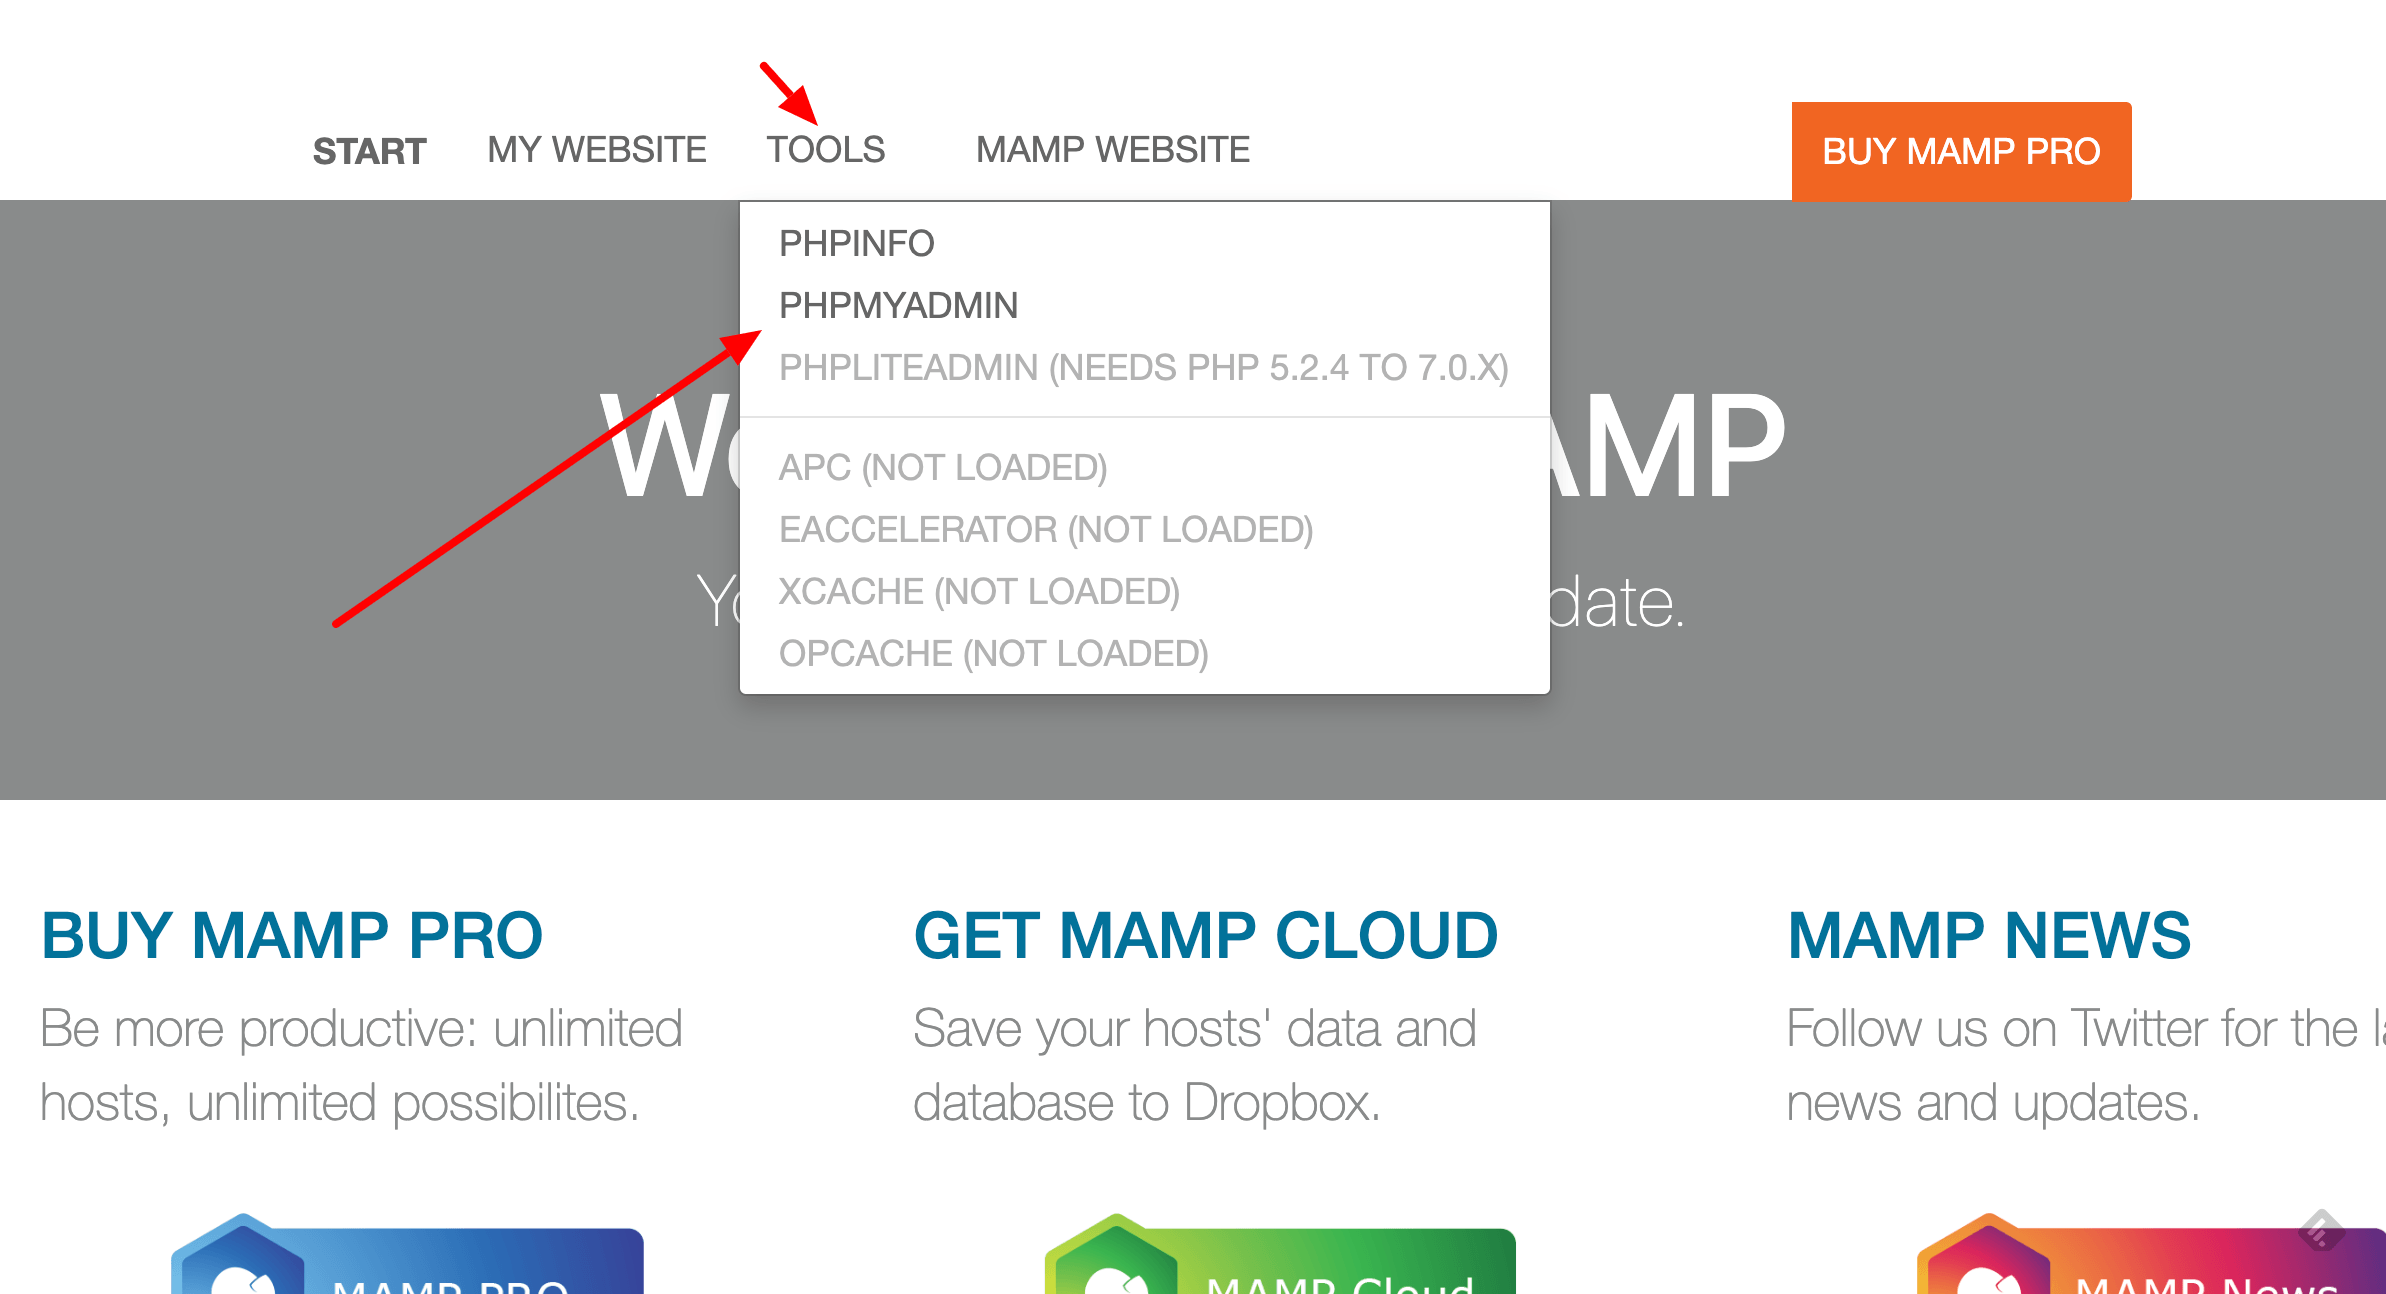
The next step is to create and import your database into MAMP. First, we will use PHPMyAdmin to create a database. Open PHPMyAdmin.
In PHPMyAdmin we can create a new database. We’re going to give it the same name as our WordPress database. In my case, it will be called “teamc4_wrdp1”. Click on the database table, enter the name of your WordPress database and click create.

Import Your WordPress Database
Now we’ll import our WordPress data into the database we just created. To do this you need a SQL client on your desktop. I use SequelPro on Mac. HeidiSQL is a good option on Windows.
Open your client and create a new connection to your local database. The user name and password are “root”. The port is 8889 and the host is 127.0.0.1 (default local IP address).

Then I’m going to select my new database.

Now we need to go back to our download folder and unzip the SQL file.

Now we need to open the SQL file with our SQL client. This file is rather large so you will get a warning. Click import. When you do this SequelPro will create the tables for you. If you are on Windows you may have to open and then execute the .sql file to create the tables.

It may take some time to import the SQL. Once loaded you need to execute the SQL to create all of your database tables from the production WordPress environment.
Now you need to change the URL for the development blog. In SequelPro select the “wp-options” tables. Double click on the “siteurl” field and enter “http://localhost:8888” as your new URL.

Updating the wp-config.php
We need to update wp-config.php to point to our local database. Go to your web root folder and open the wp-config.php file in your favorite editor. The database name should be the same if you followed the direction above. The DB_USER should be “root” and the DB_PASSWORD should be “root” for the local environment. You also want to make sure the DB_HOST is “localhost”. Save this file.
define('DB_NAME', 'teamc4_wrdp1'); // The name of the database
define('DB_USER', 'root'); // Your MySQL username
define('DB_PASSWORD', 'root'); // ...and password
define('DB_HOST', 'localhost');
Check the Development Site
Now that you have configured everything you need to get your WordPress site running on MAMP it’s time to test it. Open your browser and browse to http://localhost:8888
You should now be able to access your development site:
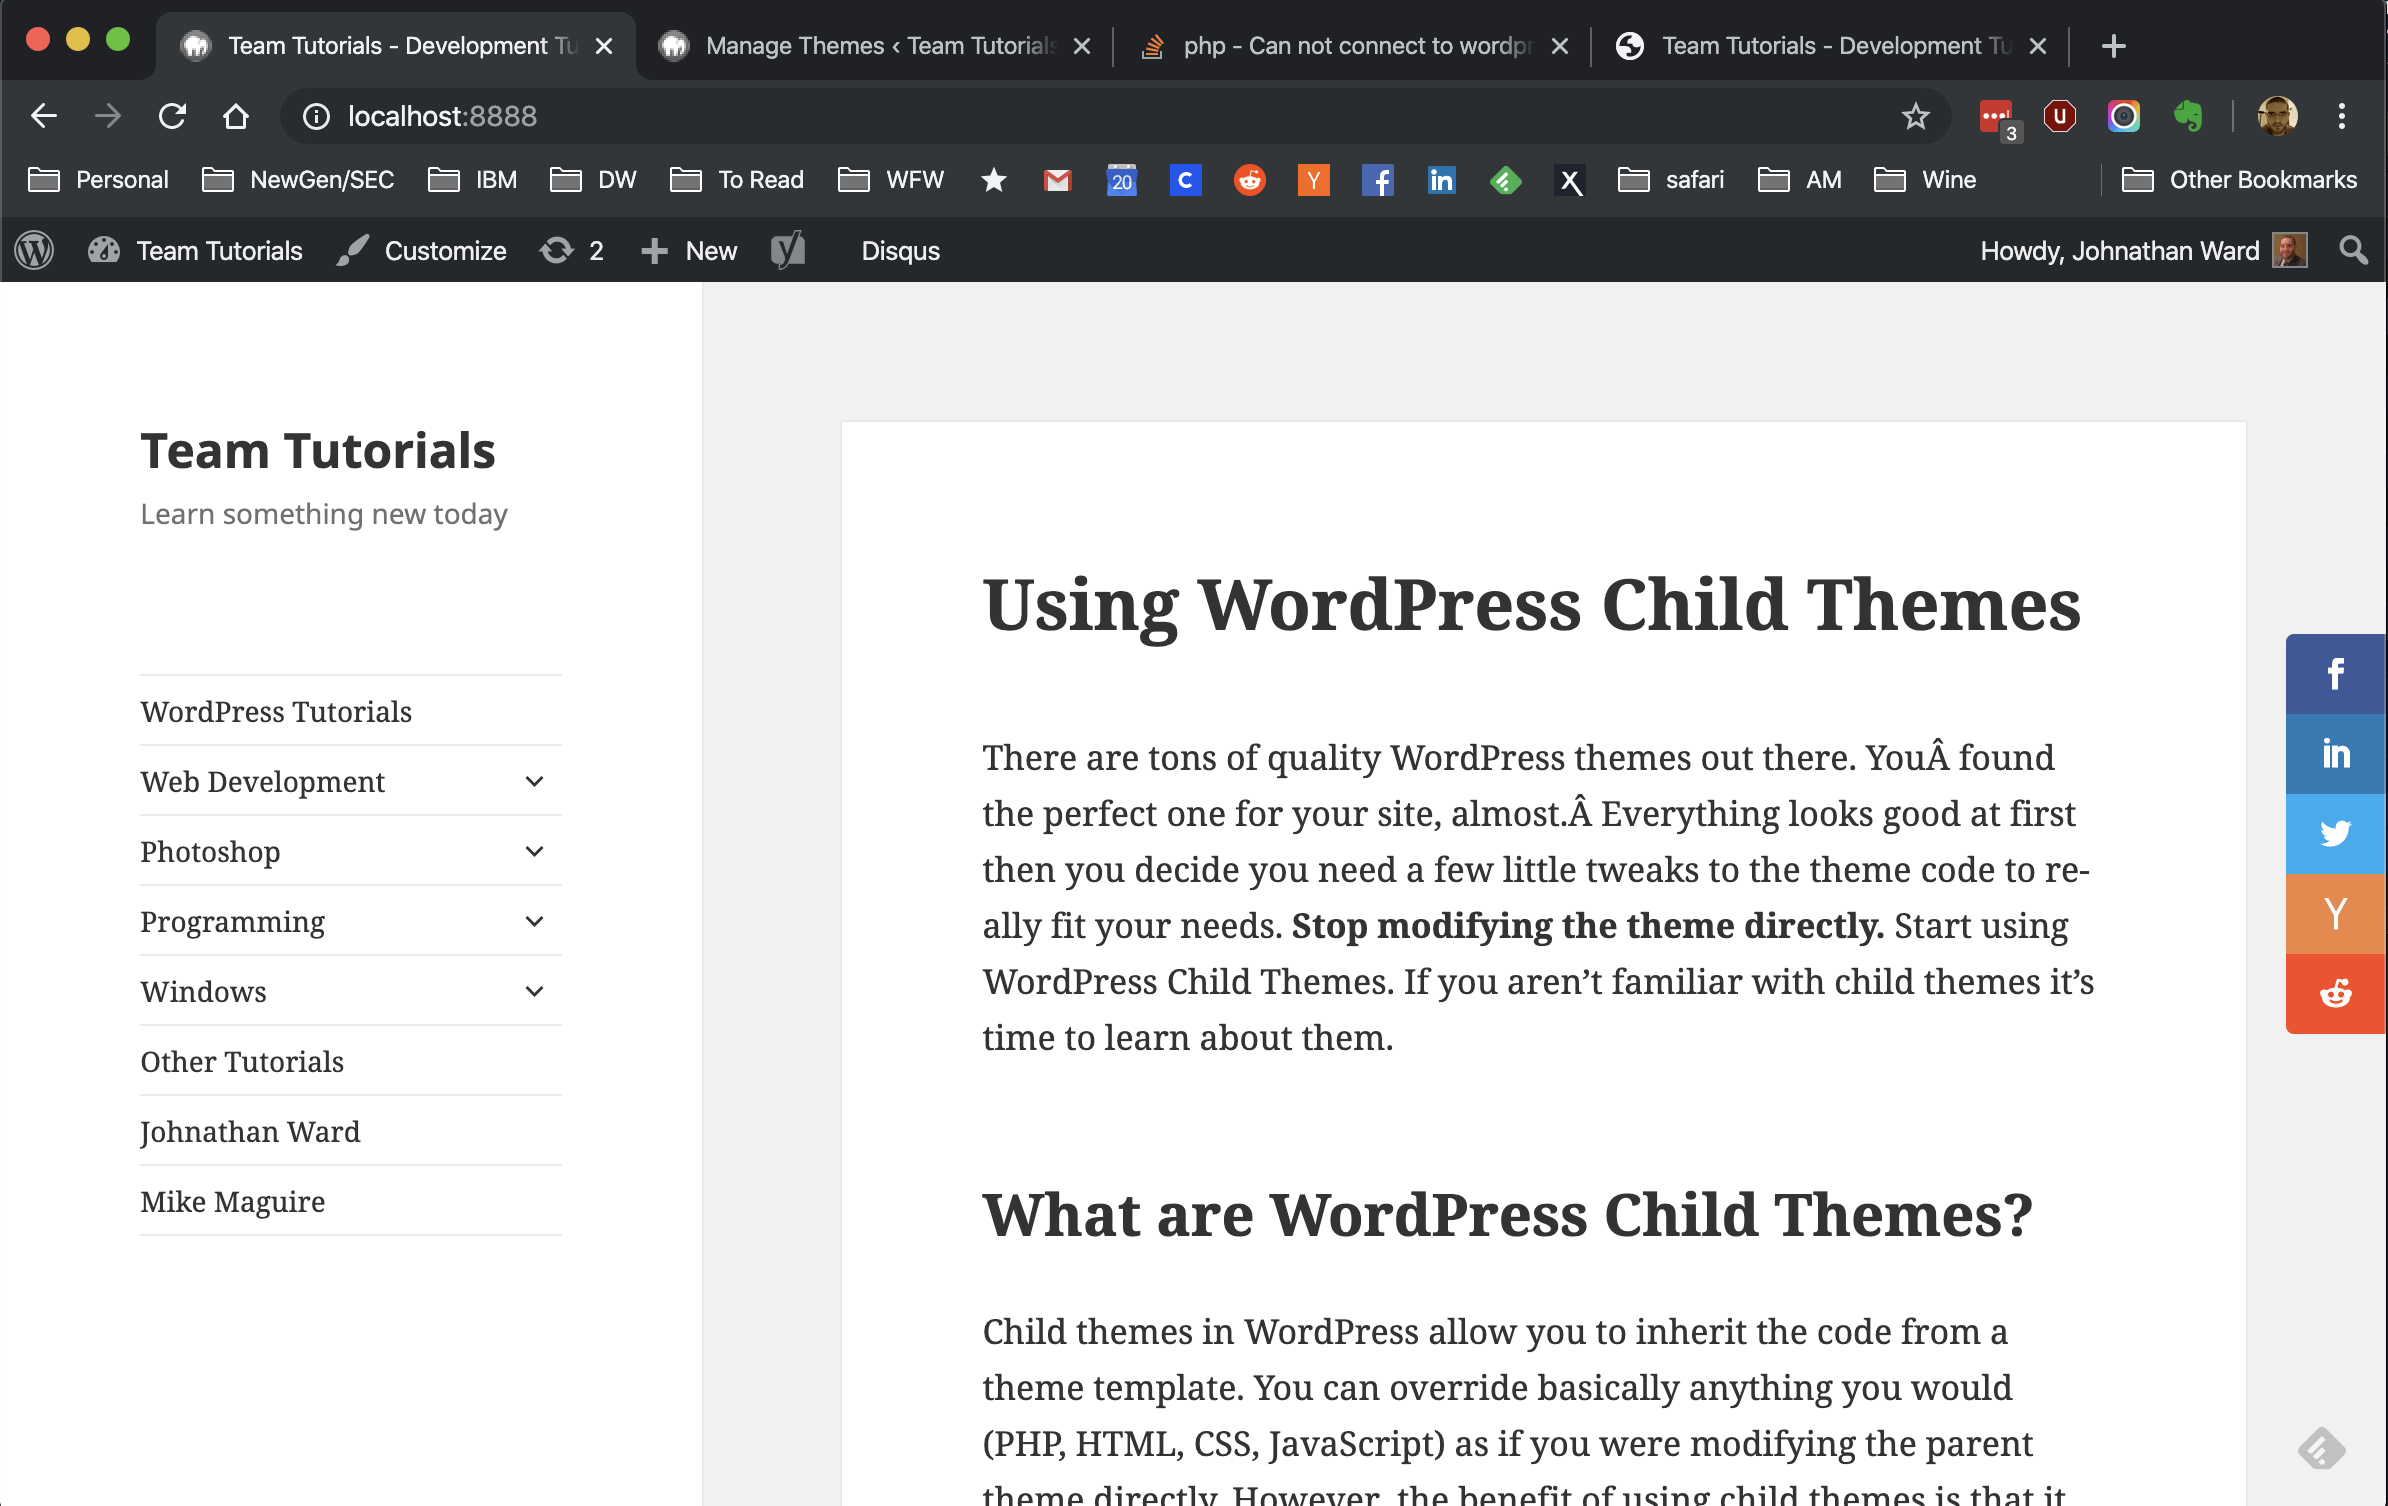 *You’ll notice above that my theme looks a little bit different. I had a problem with my child theme and had to disable it. I will look into that issue later.
You can log into your WordPress admin panel at http://localhost:8888/wp-admin
Conclusion
I hope this tutorial has helped you make a development version of your WordPress site on your local maching using MAMP. If you have any questions please leave a comment below.